
Introduction
Wireframing and prototyping are fundamental skills in UX and UI design processes. Be it for a mobile app, web interface, or any digital product, both processes serve as the blueprint and preliminary model for the design under consideration. Wireframes are like blueprints—they lay down the structure, hierarchy, and placement of content without distraction by visual presentation. Prototypes add interactivity and demonstrate functionality, allowing clients and stakeholders to view a near-realistic functioning of the actual product. Collectively, they form the base of user-centered design and ensure that the final product caters to the users’ expectations.
Learning wireframing and prototyping from scratch does seem a bit formidable, especially to those beginners who haven’t been exposed at all to the prolonged methods of design. However, with good tools, methodologies, and practice, anyone can master those skills. In fact, these processes largely concern logical thinking, user empathy, problem-solving, and more – they really are not about being an artist. In this article, you’ll find every step of the way into wireframing and prototyping basics, what each means in product development, a round-up of helpful tools for infant learners, and how to create a workflow that has both. By the end, you’ll have developed a strong foundation and confidence to start designing effective wireframes and prototypes for any digital project.
Understanding the Role of Wireframes in Design
What Is a Wireframe?
The definition of a wireframe is any quick and visual guide to represent the skeletal structure of a digital interface. Wireframes represent something much like a blueprint for the website or application; that is, it presents an outline of the layout, hierarchies of content, interface elements, and navigation without any graphical enhancements or color schemes. Since wireframes are mostly grayscale, they consider structure over style. They answer certain key questions: where buttons will go, how users will navigate from one screen to another, and which screen information should be prioritized. This thus enables designers to think logically about user flow, page structural approach, and functionality before putting their heads into the aesthetic aspect of the design.
Early in the project, when the wireframe is created, there are a lot of advantages. It serves as a clear visual reference of the prospective product for communication purposes between designers, developers, and stakeholders. The wireframes help eliminate misunderstandings and assumptions, becoming a launching pad for future design stages. Being low-cost and quick in creation, particularly with rapid digital tools such as FIGMA, Balsamiq, or Adobe XD, these wireframes help teams quickly iterate and move forward with a few divergent ideas before a considerable amount of time is spent in serious design work. In short, it aids in speeding up product development and keeping every stage truly user-centered.
Types and Levels of Wireframes
The various forms that wireframes take are dependent on how much work has been done so far and how much in detail the wireframe has to be activated. In general, wireframes can fall into any of the following three classifications low-fidelity, mid-fidelity, and high-fidelity wireframes. Often these are hand-drawn sketches or crude digital drafts, and convey fairly general layout ideas, without much detail or precision. These are great for brainstorming and fast iteration. Mid-fidelity wireframes add more structure such as grid systems and placeholder text or icons, giving them more acceptance early on in stakeholder feedback. Finally, high-fidelity wireframes have the look and feel of a finished product, usually with real content and pixel-perfect alignment, but without the interactivity of prototypes.
Different levels of wireframes are used for different purposes. Low-fidelity wireframes facilitate creativity and teamwork because they lend themselves to easy alteration. Mid-fidelity wireframes represent the first real point of alignment in the relationship with the client or stakeholders, indicating how content will be structured. Completed high-fidelity wireframes would serve as part of the bridge to the next stage of prototyping by allowing detailed feedback collection before transitioning to interactivity. Knowing when and how to involve each type makes your design process efficient, responsive, and user-centered. The aim remains the same, regardless of fidelity: to clarify the design decisions and achieve usability right from the very start of a project.
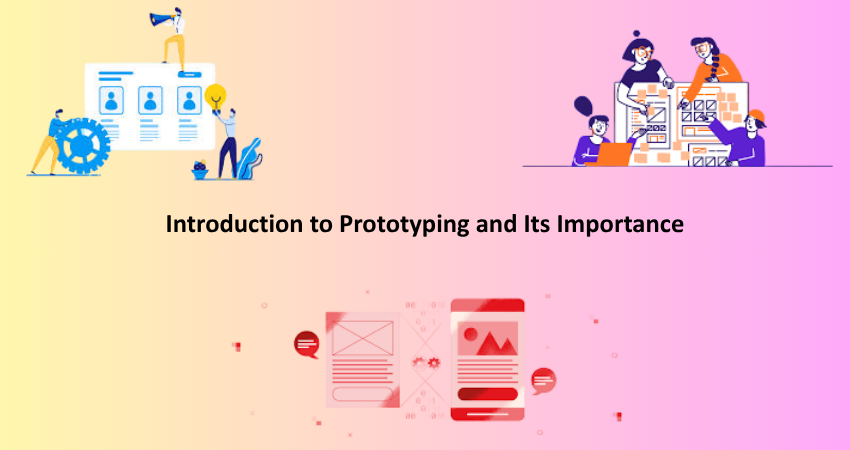
Introduction to Prototyping and Its Importance
What Is a Prototype?
A prototype refers to an initial model or simulation of a final product that imitates its user interface and interaction behavior. Prototypes differ from static wireframes in that they allow for a dynamic representation of the user experience. Clicking, tapping, scrolling, and navigating in prototypes simulate the experiences offered by the actual application or website. Prototypes could go from simple screen-to-screen transitions to fully simulated interactions imitating real-world behavior. All this makes prototypes invaluable to testing usability, gathering feedback, and demonstrating functionality even before any code is laid down.
The value of prototype creation primarily lies in the fact that it brings ideas into life. Once a prototype is created and the stakeholders or users interact with it, one can understand how the final product will feel or function. It may bring out usability issues, confusing interfaces, and unwanted features much earlier than they become expensive to correct. Designers would then iterate on this information by refining the design further before going into development. This eliminates costly mistakes by finding a design error at an early stage. Whether you work as a single person or in a team, prototyping makes sure a user-centered design is in place and ends in a better product and a more enriching process.
Types of Prototypes and Their Use Cases
Based on purpose and modeling technique, prototypes can be generally classified as low-fidelity, medium-fidelity, or high-fidelity prototypes. Low-fidelity prototypes consist of paper sketches or rough drafts built using basic digital tools, making them suitable for testing concepts very quickly and holding discussions internal to the design team. Medium-fidelity prototypes are those that incorporate more realistic layouts and interaction but are still filled with placeholder content. Great for usability testing or stakeholder reviews. High-fidelity prototypes designed in tools such as Figma or Adobe XD may closely replicate the final product in look and in behavior, and therefore, may be used for final validations and hand-off to developers.
Prototypes differ from one project to another; they will change depending on the phase of the project, objectives, and target audience. During the early stages, low and medium-fidelity prototypes are created for quick experimentation. When design travels towards maturity, such prototypes become high-fidelity and basically hold the truth of the development stages for stakeholder approval. Interactive prototypes therefore both serve as bridges between the design and development teams concerning their understanding and implementation of animations and transitions, as well as user flows. In an agile design context, skills for rapid and effective prototyping become paramount as they shorten feedback cultering and further minimize overall production time.
Tools to Get Started with Wireframing and Prototyping
Beginner-Friendly Wireframing Tools
If you are starting from scratch, consider tools that are intuitive and friendly to beginners. Balsamiq is popular for the low-fidelity wireframe because of its drag-and-drop interface and hand-drawn look, which emphasizes brainstorming over perfection. It is well suited for sketching layouts and getting ideas down without being overly concerned about high visual fidelity. Another very good tool for this is Figma, which can be used for both wireframing and collaborative design. Thanks to its simple interface and cloud-based collaboration, Figma is tailor-made for both remote teams and beginners. This allows you to move seamlessly between wireframes and prototypes as your project progresses.
Adobe XD is another strong option that will give you built-in wireframe kits and navigation tools to land you in page layouts. For users within the Adobe ecosystem, it could mean a smoother transition into XD. Other alternatives include Sketch for macOS users and Lucidchart, which is browser-based. The basic requirement is to choose tools that suit your comfort and workflow pattern. Most of these tools offer free plans or trials allowing you to have a go at them before sinking your money in. Pick a tool that makes it easy for you to learn and work on other various things like structure of layout and user flow.
Best Prototyping Tools for Beginners
Once you are comfortable with wireframing, it is time to choose a prototyping tool that will suit your requirements. Figma is always a top recommendation because it has one interface for design and prototyping. You can easily turn your wireframes into clickable prototypes including animations and transitions with user flows. Furthermore, Figma allows for team collaboration, which comes in handy when seeking feedback or working with developers. Adobe XD also provides robust prototyping capabilities, including voice interactions, auto-animation, and responsive resizing. It’s a well-rounded option for both low-fidelity and high-fidelity prototyping.
InVision and Proto.io are advanced interaction and user testing methods used for performing specialized prototypes. They assist in demonstrating work to clients and in remote usability testing. Another fairly applicable tool for quick and simple iterations is Marvel. With its straightforward interface and built-in integrations with other designing tools for efficient workflow, Marvel allows for considerable speed in prototyping. As a novice, master one tool after another, connecting screens, defining hotspots, and simulating real user journeys. The right prototype tool does more than simply render designs: it enhances communication skills in articulating design intentions.
Common Mistakes to Avoid as a Beginner

Skipping the Planning Stage
The most common error among the novice designers in this field is to keep jumping into wireframes or prototype-making, without spending time on actual preparation work. Planning means defining the user personas, understanding project goals, plotting user journeys, and even writing outlines for the content. Not having gone through this phase, one may find oneself designing features misaligned with real user needs or business objectives. Design planning gives each screen, button, interaction in a prototype, and, therefore, the most meaningful design decisions.
Planning also makes it possible to design an avenue for the project. Thus, it maximizes resource usage and enables coordination with customers or internal teams, avoiding overlap in design iterations. Some beginners are inclined to think of wireframes as the planning process itself, not realizing that it is simply a step-by-step process following clear strategic planning. Take time to understand your target audience, document functionality requirements, and sketch out navigation flows. This groundwork strengthens your designs and helps avoid unnecessary revisions later.
Overcomplicating the First Designs
Overloading your first wireframes or prototypes with too much detail is, again, a typical beginner error. Beginners think that such designs look more professional; however, simple is the key—especially in UX. A wireframe packed with advanced interactions, animations, or components taken in great detail will obfuscate usability tests and feedbacks. Instead of finetuning the essential functions, you would better have gotten tangled up in the technical aesthetic, which can be treated later.
It makes the designs user-friendly and improves the communication aspect between stakeholders and clients. Because of visual noise, clients and stakeholders can hardly give precise and straight cuts of feedbacks when it comes to this area. Go basic: hierarchy of content, where buttons should be, and navigation flow. Accumulate everything else later in the iterations once the foundation is really solid. By keeping things simple, you do not burn out early in the learning process but keep room for consistent improvement.
Conclusion
Learning wireframing and prototyping from scratch is, indeed, one important course towards establishing oneself as an expert digital designer. Those rudimentary skills help in building user-centered interfaces with a well-structured piecemeal approach, and at the same time, it minimizes wastage of huge resources while developing the systems. Upon knowing what type of wireframe or prototype should be used for a given scenario, all these gradually start to put you in control as part of the collaborative team across the associated teams through better improving understanding between team members. Always choose tools that are easy for beginners to use so that the learning curve can be simple and you can focus on creating good basic design skills.
Intuitive and efficient experiences, however, is a key thing that this always brings along. And that’s precisely what you train on wireframing and prototyping. As you grow with your design, the use of wireframes and prototypes becomes very second nature to you when wanting to build out complex projects. Over the years, these skills will equip you to develop fun, functional digital products that solve real problems and wow your clients. Work, bar the practice and feedback, under the right tools will turn abstract ideas into concrete digital experiences. Start today; each wireframe and prototype brings you closer.